Trying to decide between a tiled tray, a prefab base, or a curbless wet room but unsure which actually stays dry? Leak risk lives in slope and laps, not looks. Bathroom shower systems comparing tiled tray, prefab acrylic base, and wet room floor shows that construction depth, waterproofing continuity, and tile size drive long term cost.
What Each Shower System Covers and How It Is Built
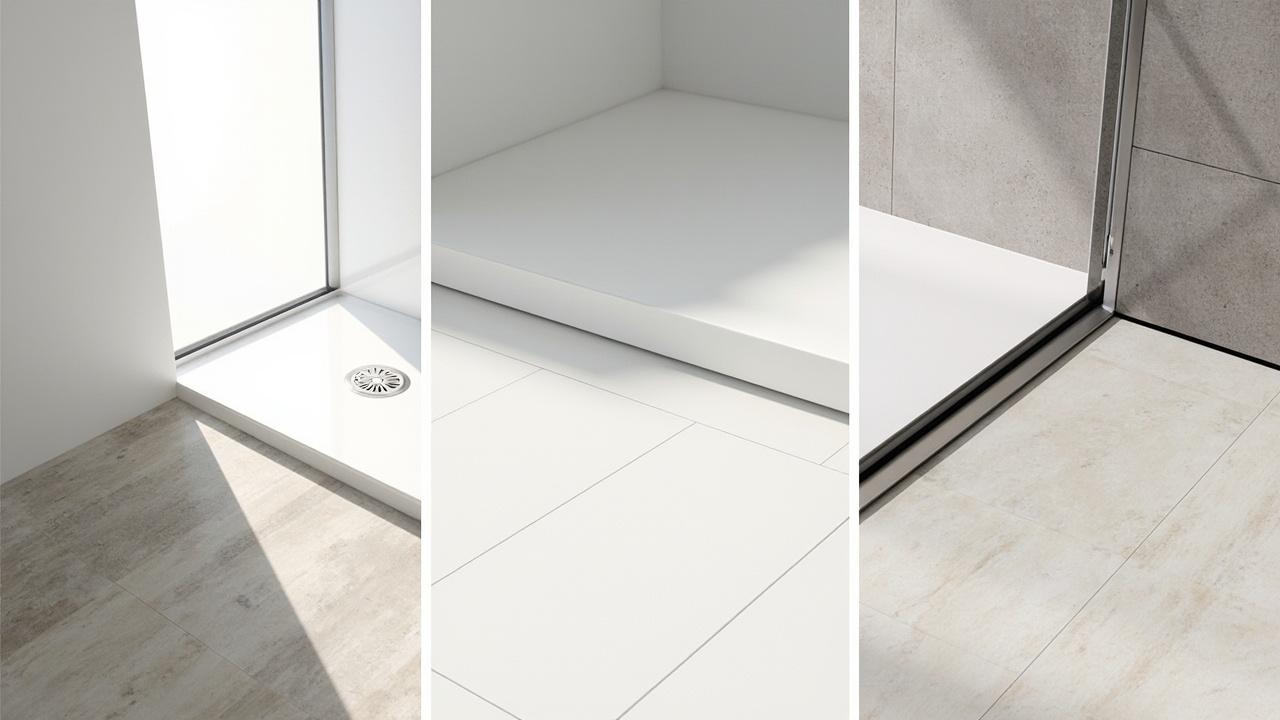
Bathroom shower systems cover the floor build that collects, seals, and drains shower water. A tiled tray is a site-built screed and waterproof membrane finished with porcelain tile. A prefab acrylic base 900×900 is a factory tray with upstand and waste set into the screed. A wet room floor extends the same screed and membrane across the entire bathroom to a single linear drain.
Structure differs at the edge. A tiled tray relies on lapped membrane 150 mm up walls and a screeded slope 15 to 25mm per meter toward a point drain. If that lap is short, water finds the wall core even though tiles look perfect. A prefab base brings its own upstand of 25 to 35 mm that overlaps wall membrane, reducing lap risk but fixing the footprint.
A wet room uses one plane. The floor falls 15 to 20 mm per meter across the whole room to a slot, with cement board or tanked render behind all walls. There is no step, so threshold detail and door position decide whether water stays inside during a long shower.
Weight and height matter in renovation. A tiled tray adds 40 to 60 mm build-up, a prefab base adds 30 to 45 mm plus linings, and a wet room may add 50 to 70 mm over a 3 meter run. On upper floors, that height affects door clearance.
How Each System Handles Water, Movement, and Airflow
Tiled tray performance depends on screed quality. Porosity and hollow spots under porcelain tile 600×600 hold water that later appears as damp grout. Flood testing the waterproof membrane 1.2mm for 24 hours before tiling is the checkpoint that catches pinholes while they remain visible.
Prefab acrylic base handles movement well because the one-piece tray flexes as a unit and drains immediately to its integrated waste. However sealant at the tray to wall junction carries the risk. A 6 to 8 mm bead of flexible silicone sealant must be renewed every 3 to 5 years, or capillary action draws water behind the board.
Wet room floor relies on perfect single-direction fall. A 3 mm dip over 1200 mm on a wet room holds a shallow sheet across the whole floor instead of a small puddle in one tray. With correct fall verified by laser and a linear drain 800mm, large 600 by 120 to mm tiles stay flat and dry in one direction, but any dip is amplified by area.
Ventilation multiplies or masks these differences. A wet room without an exhaust fan 120 to 150 cubic meters per hour drying the full floor leaves moisture at 80 to 90 percent for 30 minutes longer than an enclosed tray with the same fan. Enclosure contains splash, open floor spreads it. For runs above 4 meters or near electrics, consult a professional.
Side-by-Side Comparison and Real Cost Over the Build Life
For a defined 900 by 900 mm enclosure with existing level floor, a prefab acrylic base with wall cement board and local membrane laps installs fastest and limits wet-trade risk. Expect $320 to $480 for the tray plus $120 to $200 per square meter for walls and tiling.
For a custom size or level-access entry, a site tiled tray with screed at 15 to 25 mm per meter and porcelain tile adapts to any dimension and keeps tile continuous from floor to wall. Budget $180 to $280 per square meter all in.
| Criteria | Tiled Tray Site Built | Prefab Acrylic Base | Wet Room Floor |
|---|---|---|---|
| Waterproofing Path | Site membrane lapped 150 mm, flood tested | Factory tray plus sealant, wall membrane overlaps upstand | Full floor membrane, one plane to linear drain |
| Slope Needed | Four-way or two-way 15 to 25 mm per m to point drain | Pre-formed fall in tray, minimal screed | Single-direction 15 to 20 mm per m across room |
| Tile Size Freedom | Best with 300 to 600 mm, large needs perfect screed | Tray not tiled, walls any tile | Large 600 to 1200 mm lays flat on one-way fall |
| Leak Risk Point | Corner laps and pipe penetrations | Silicone bead at tray to wall | Threshold and entire floor flatness |
| Installed Cost | $180 to $280 per sqm | $320 to $480 tray plus $120 to $200 per sqm walls | $220 to $340 per sqm, more membrane area |
| Lifespan if Maintained | 10 to 14 years | 8 to 12 years then reseal or replace tray | 10 to 15 years with rigid ventilation |
The relationship to watch is repair access. A failed corner lap in a tiled tray requires stripping tiles to substrate to re-lap, while a failed sealant line on a prefab base can be cut and renewed in an hour. A wet room failure at the threshold may wet the hallway in one event because there is no tray edge to contain it.
Installation Sequence and Mistakes That Cause Leaks
For a tiled tray, set cement board 12mm or render, then screed the fall and verify with a 1200 mm straightedge. Prime, then apply waterproof coating 1.2mm cross-coated with fabric at corners and around the drain assembly. Flood-test 24 hours at 25 mm depth before any tile starts.
For a prefab base, level the base on full mortar bed, not spot pads, and check the upstand is plumb. Lap wall membrane over the upstand by 30 to 50 mm, then tile with an 8 mm trowel and keep a clean silicone sealant joint at the base to wall, tooling it to 6 mm depth without three-sided adhesion.
For a wet room floor, tank all walls to 150 mm above shower head height, screed the entire floor to the linear drain in one direction, and verify fall from every corner. Lay large porcelain with back butter and 2 to 3 mm joints, keeping a flexible expansion gap at all perimeters.
Common errors cross all three. Packing the expansion gap with cement grout cracks the corner in the first thermal cycle. Using gypsum board behind a tiled tray softens at the first pinhole. Ending the exhaust duct in the ceiling void instead of outside moves moisture to insulation. And spot-bedding a prefab base leaves a hollow that flexes and cracks the waste connection within months.
Limits, Edge Cases, and How to Decide for Your Bathroom
No system suits every structure. On timber joists deflecting over 2 mm per 600 mm, a rigid tiled tray cracks grout without a decoupling mat, while a prefab base isolates movement better. Weigh the floor, not just the look.
In compact bathrooms under 3 square meters, a wet room floor can make the whole room wet after one shower unless a glass screen and exhaust fan 150 cubic meters per hour with humidistat contain and clear moisture. Without both, towels never fully dry.
For homes on upper floors where ceiling height is tight, a wet room or deep tiled tray may raise floor level 50 to 70 mm and require trimming doors. A prefab base keeps height lower and suits tight thresholds.
Choose tiled tray if you need custom size and want tile fully continuous. Choose prefab base if you want fastest install and easiest reseal access. Choose wet room if you want level access, accept full-floor membrane cost, and can provide strong ventilation to outside.
Start from the overall plan in our bathroom renovation guide with layouts and real costs, check material tolerances in the bathroom renovation materials guide, and see drainage sizing in the bathroom drainage and ventilation guide before ordering. For structural cuts or sealed electrics, consult a professional.


![Deck Railing Code: Height & Baluster Spacing Guide [IRC ]](https://www.terasly.com/wp-content/uploads/deck-railing-code-height-baluster-featured.jpg)