You’ve noticed the siding feels soft at the base of the house, or the same patch of peeling paint keeps coming back no matter how often you repaint, or there’s a faint musty smell near a bedroom window that never quite goes away. The frustrating part is not knowing whether you’re looking at a $300 caulk-and-patch fix or a $5,000 wall-section rebuild. Siding moisture intrusion, mold, and rot behind cladding is a layered problem where surface symptoms rarely match the actual damage underneath, and the only reliable diagnosis works backward from how water got in, not forward from what you can see.
What siding moisture intrusion, mold, and rot look like (and what they don’t)
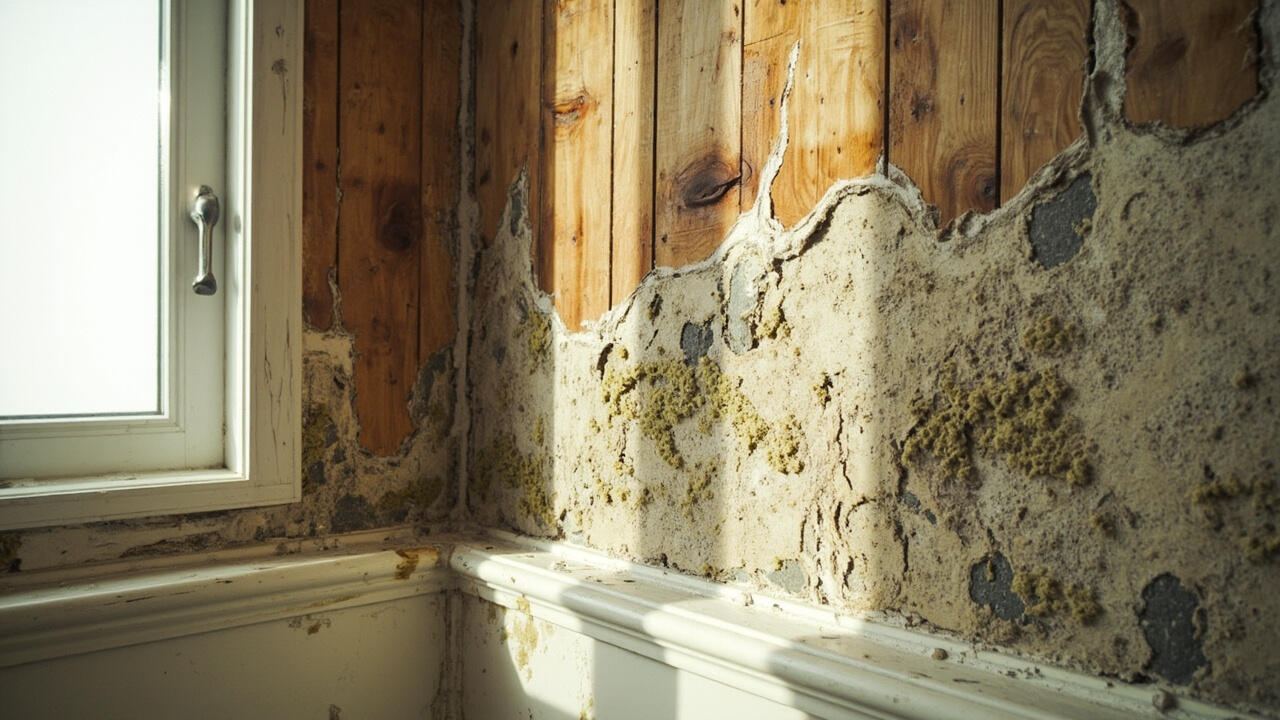
The visible signs of moisture damage behind exterior wall systems are misleading. Peeling paint, bubbling vinyl, soft spots at the bottom course, and a musty smell are all surface clues, but none of them tell you how deep the damage goes or whether the rot has reached the sheathing underneath. A hairline crack in caulk or a missing kick-out flashing at the roofline can drive water 3 to 6 feet down the wall cavity before any symptom shows on the face.
Mold and rot are different problems that often appear together. Surface mold on the cladding face is usually cosmetic and wipes off. The dangerous kind grows on the back of the siding, on the weather-resistive barrier (WRB), and on OSB or plywood sheathing, where it feeds on trapped moisture and temperatures between 60°F and 80°F. By the time you smell mustiness indoors, the colony behind the wall has usually been active for months.
Here’s a quick disambiguation that actually helps in the field: peeling paint alone usually points to a paint or vapor-drive problem, not structural rot. Soft siding you can push in with a thumb points to rot of the siding itself or the sheathing behind it. A persistent musty smell with no visible staining points to concealed mold in the wall cavity, often around windows, deck ledger boards, or the base course where the siding meets the deck or grade.
How water actually gets behind the cladding – the capillary mechanism
Water almost never enters a wall through the face of the siding. It enters through a small failure point, then wicks sideways and upward through capillary action, the same physics that pulls water up a paper towel. A 1/8-inch opening at a window head can wet a 2-foot radius of sheathing within a single storm because the water follows the path of least resistance along the back of the cladding, not down the face.
The four most common entry points, in roughly this order of frequency, are failed or missing caulk at penetrations and trim joints, missing or corroded flashing at roof-to-wall transitions and deck ledgers, torn or omitted WRB behind older siding (especially homes built before the mid-1990s), and direct ground or deck contact at the base course where siding dips below 6 inches of clearance. Any one of these is enough to start the cycle; two or more turn a repair into a section replacement.
A pin-type moisture meter is the cheapest reliable way to see what’s happening. The thresholds that matter on wood sheathing and framing are roughly 15% moisture content as a wet warning, 19% as active moisture, and anything above 25% as structural risk where rot is either underway or imminent. If a wall reads 19% or higher two weeks after a dry spell, the water source is active, not historical, and a surface patch will fail within a season.
That’s also why repainting never fixes this problem. New paint seals the face of the wall, which traps moisture that was already escaping outward and accelerates rot on the back side. The wall dries from the inside out, not the outside in, so anything that blocks the outward path makes the cavity wetter.
When to repair vs. reside vs. fully replace – the conditional decision
The right scope depends on three diagnostic signals: the moisture meter reading, the age of the siding, and how many walls are affected. Each signal moves you toward a different bucket, and the buckets have very different price tags and lifespans. Below is a working matrix you can apply with a meter and a notepad before you call anyone.
| Scope | Best when | Typical US cost range | Expected life after repair |
|---|---|---|---|
| Spot repair | Single entry point, MC <15%, siding <15 yrs old, damage on one wall | $300 to $900 | 5 to 10 years |
| Section replacement | MC 15 to 19%, rot confined to one wall face or one story | $1,500 to $4,500 | 15 to 25 years |
| Overlay reside | Siding structurally sound, MC <15%, but original cladding past 20 yrs | $8 to $14 per sq ft | 20 to 30 years |
| Full tear-off and replacement | MC >19% two weeks running, rot at sheathing, multi-wall spread, or pre-1990s build with no WRB | $15 to $25 per sq ft | 30+ years |
Two rules of thumb carry most of the decision. Choose a section repair when the moisture meter holds below 19% and the damage stops at one wall. Choose full replacement when the meter stays above 19% after a two-week dry period, when the rot has visibly reached the sheathing, or when more than one wall shows symptoms, because multi-wall spread almost always means the WRB has failed, not just the caulk.
For a deeper comparison of cladding options that hold up better in wet conditions, see our siding materials compared. For the full picture of how the wall assembly should be built (wrap, drainage plane, and flashing), the siding installation and house wrap guide walks through each layer step by step.
Step-by-step diagnosis you can do in a weekend
The screwdriver test comes first because it costs nothing and tells you whether the siding itself is solid. Press the tip of a flathead screwdriver into the bottom 8 inches of each wall face, especially near corners, hose bibs, deck ledgers, and below windows. Solid siding resists and barely marks. Rot pushes in with thumb pressure, often with visible darkening or a musty smell on the screwdriver tip.
Next comes the moisture meter walk. A pin-type meter runs about $30 to $80 and pays for itself on the first wall. Take readings at the base course, at every window sill, at any horizontal seam, and on a dry interior reference wall for comparison. Map the readings on a simple sketch of the house so wet zones show up as a pattern rather than isolated points. A pattern that climbs upward from the base points to grade or deck contact. A pattern that radiates from a window points to flashing failure. A pattern that covers an entire wall face points to a failed WRB.
For entry points you can’t see, selective panel removal is the next step and the one most homeowners hire out. A siding contractor will remove two or three boards at the suspected leak, inspect the WRB and sheathing behind, and usually reinstall the same boards. Expect $150 to $500 for this kind of invasive inspection, which is worth it because it converts guesswork into a photograph. Thermal imaging can flag wet sheathing from the exterior without removal, useful on larger homes, though it works best at dusk and after a dry day.
Limits of DIY diagnosis and when to call a pro
A moisture meter cannot see mold, only wetness. A reading below 15% on wood does not rule out an active mold colony on the back of the drywall inside the wall cavity, especially if the musty smell indoors persists. If occupants have ongoing respiratory symptoms, the right next step is a separate indoor air quality test for mold spores, not another wall reading. For homes with moisture readings above 19%, visible fruiting bodies, or any sag in the sheathing, the structure itself may already be compromised and a structural engineer is the appropriate call, not a siding contractor.
Choosing between contractors comes down to the question you’re asking. A siding contractor diagnoses and fixes the cladding, flashing, and WRB. A structural engineer evaluates framing, joists, and load-bearing walls when rot has clearly moved past the sheathing. For homes built before 1990 without a modern WRB, or for any wall where moisture readings stay above 19% after a dry fortnight, the smart move is to bring in an engineer first and a contractor second, because the scope of work changes dramatically once structural repairs enter the picture. For related decisions on material choices that hold up better in wet climates, see our guide on vinyl vs fiber cement siding.
Decision guidance: Choose a spot repair if moisture readings stay below 15%, damage is on one wall, and siding is under 15 years old. Choose a section replacement if readings run 15 to 19% and damage stops at one wall face. Choose a full tear-off and replacement if readings hold above 19% two weeks after a dry spell, if rot reaches the sheathing, if more than one wall is symptomatic, or if the home predates modern flashing codes. In every case, fix the water entry before the cosmetic repair, or the same problem returns inside two seasons.