
You’ve measured the total rise, picked your lumber, and laid out the framing square. But the moment you mark that first tread notch, one wrong cut ruins an entire board. That hesitation is normal – and fixable. Stair stringer layout cutting is the process of marking and cutting triangular notches into a 2×12 pressure-treated board so each tread depth and riser height aligns perfectly from top to bottom landing. Get it right, and your stairs feel solid underfoot. Get it wrong, and you’re recutting on a $18 piece of lumber. Here’s how to execute it correctly the first time.
What Stair Stringer Layout Cutting Actually Means
Stair stringer layout cutting assembly is the sequence of measuring, marking, and sawing triangular notches into a structural stair stringer – the inclined beam that carries the load of every step. Each notch defines one tread (the part you step on) and one riser (the vertical board between steps). The layout phase determines accuracy; the cutting phase locks it in.
Why does this matter more than the lumber choice? Because even premium 2×12 Douglas fir fails if notches are cut 3mm too deep or tread lines slope by 1°. The structural integrity of your staircase depends on consistent geometry across all 13-17 notches, not on the board’s grade stamp. One inconsistent riser height creates a tripping hazard that no railing can fix.
The core relationship: total rise divided by desired riser height (170-180mm for residential) equals the number of steps. Multiply steps by tread depth (250-280mm) to get total run. These four numbers drive every mark on the board.
Three entities control the outcome: the framing square with its stair gauges (locks the angle across all cuts), the circular saw with a sharp 40-tooth blade (limits overcut to under 2mm), and the straightedge (prevents blade wander on long cuts). Missing any one of them introduces cumulative error.
How the Mechanism Works: Specific Numbers and Tolerances
The math comes first. Measure total rise from finished floor to finished floor – not from subfloor. Divide by 175mm (the comfortable midpoint for riser height). If you get 13.7, round to 14 risers and recalculate: total rise ÷ 14 = your actual riser height, usually 172-178mm. That number must stay within 5mm across every step, or the stair feels uneven.
For tread depth, use the formula 2R + G = 550-700mm, where R is riser height and G is tread depth. At 175mm risers, aim for 250-280mm treads. This keeps stride natural. The nosing overhang adds 25-35mm beyond the riser below, so your actual cut line sits 25-35mm behind the tread’s front edge.
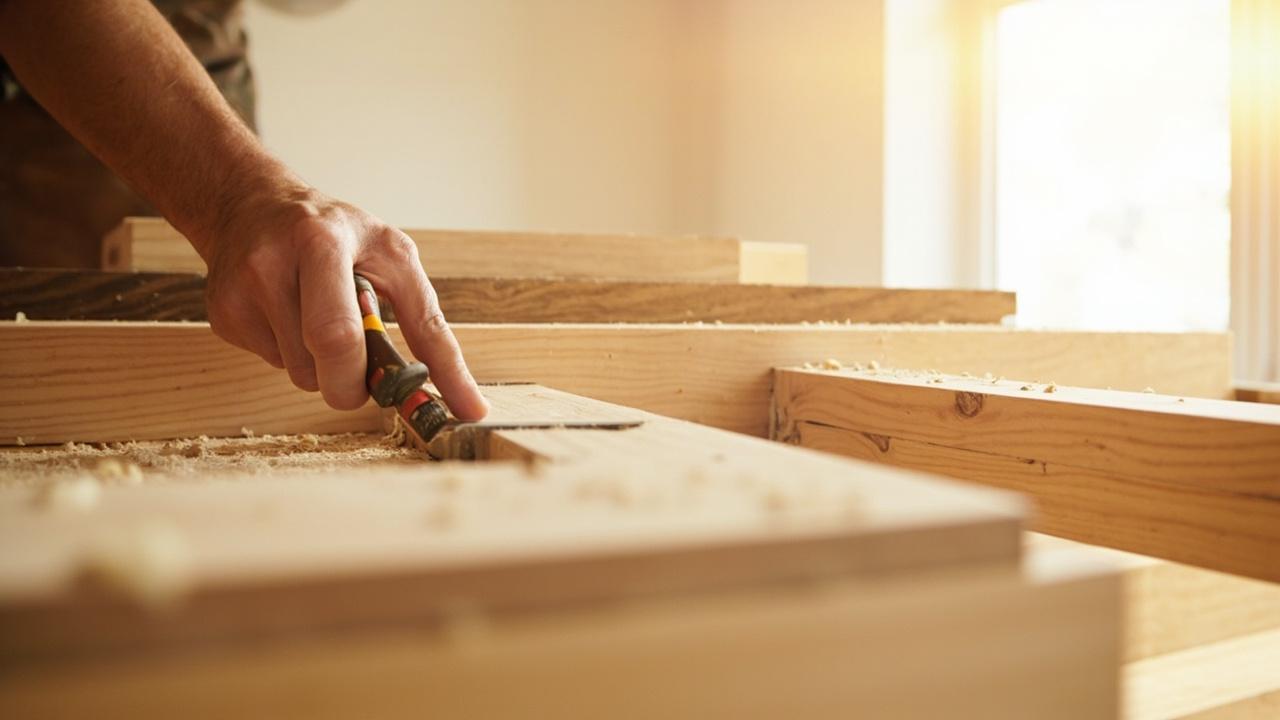
Set your framing square with stair gauges at exactly the riser height on the tongue and tread depth on the body. Slide the square up the board, keeping both gauges flush against the edge. Mark each notch sequentially – never measure each one independently. The sliding method eliminates cumulative error that individual measuring creates.
Cutting requires discipline. Set your circular saw blade depth to the board thickness plus 3mm. Cut along both lines of each notch but stop 5-8mm short of the corner intersection. Finish with a handsaw or jigsaw to prevent the overcut from weakening the notch. A 5mm overcut at the corner reduces the stringer’s load capacity by roughly 15% – enough to cause creaking or sagging within two years.
| Parameter | Residential Range | Tolerance | Consequence of Error |
|---|---|---|---|
| Riser Height | 170-180mm | ±3mm max across all risers | Tripping hazard, code violation |
| Tread Depth | 250-280mm | ±5mm | Uncomfortable stride, reduced footing |
| Overcut at Corner | 0mm ideal | Max 2mm | 15% load capacity loss per notch |
| Stringer Span (unsupported) | Max mm for 2×12 | Add center stringer if exceeded | Bounce, creaking under load |
Temperature and humidity matter more than most guides admit. At 30°C and 70% humidity, pressure-treated lumber has already shrunk 2-3mm from its wet-installation state. If you cut stringers immediately after buying, the notches may loosen as the board dries further. Let the lumber acclimate in the installation area for 48-72 hours before laying out. This prevents the tread-to-notch gap that causes squeaks.
When to Choose Which Stringer Approach (Conditional Guide)
Your site conditions determine the stringer type and material. No single option works everywhere – the trade-offs are real.
Choose a closed (solid) stringer if your staircase is indoors, the treads and risers are wood, and you want a clean finished look. Closed stringers have notches cut into the board itself. They’re stronger per board but waste more lumber – expect to buy 30% more 2×12 than the calculated length because the waste triangles can’t be reused for full notches.
Choose an open (cut-out) stringer if you’re building exterior stairs with concrete or stone treads. The open profile lets thick treads sit on top without precise notch depth. The trade-off: open stringers are visually heavier and collect debris in the notches, which matters in wet or leafy areas.
Choose steel stringers if the span exceeds mm, the stairs are exterior and exposed to rain, or the design calls for a floating appearance. Steel C-channel stringers (100x50x3mm typical) don’t warp, rot, or shrink. But they cost 4-6 times more than pressure-treated pine, require welding or bolting (not nosing), and conduct cold – uncomfortable barefoot in winter climates.
Choose LVL (laminated veneer lumber) if you need a long clear span indoors with minimal deflection. LVL stringers at 45mm thick match the strength of 2×12 solid sawn but stay dimensionally stable across humidity swings. The limitation: LVL costs 2.5-3x more than standard framing lumber and can’t be cut with a standard circular saw blade – you need a 60-tooth carbide blade to prevent delamination at the notch corners.
| Condition | Best Stringer Choice | Why It Fails in Other Conditions |
|---|---|---|
| Indoor, wood treads, budget-conscious | Closed 2×12 pressure-treated | Rot risk if used outdoors without sealant |
| Outdoor, wet climate, heavy load | Steel C-channel or concrete | Wood warps at >60% humidity long-term |
| Long span (>mm), minimal bounce | LVL or steel | Solid sawn deflects noticeably past mm |
| Tight budget, DIY-friendly tools | 2×12 solid sawn pine | Requires acclimation; prone to shrinkage squeaks |
The slope of your stair also constrains the choice. At slopes above 35° (riser height above 190mm with standard treads), the notch geometry becomes shallow and weak. Below 25°, the treads feel like shallow platforms and the stringer board wastes length. Aim for 30-35° – it keeps the notch corner angle above 55°, which preserves the board’s cross-section at the stress point.
Real-World Layout Sequence That Prevents Common Mistakes
Follow this order exactly. Skipping steps or reordering creates the errors that ruin stringers.
- Acclimate the lumber in the installation area for 48-72 hours. Stack with stickers for airflow on all sides.
- Verify total rise at the exact point where the stringer will sit. Measure from finished floor to finished floor, not subfloor to subfloor.
- Calculate riser count and height. Round to whole risers, then recalculate height. Write both numbers on the board.
- Attach stair gauges to the framing square at the exact riser and tread dimensions. Test on scrap first.
- Mark the first notch at the top, where the stringer meets the landing. This reference point determines every subsequent notch.
- Slide and mark all remaining notches sequentially. Never lift the square and reposition – slide it.
- Mark the bottom cut – the plinth or floor contact point – only after all tread notches are laid out.
- Cut with circular saw to 5mm of the corner, finish with handsaw. Check each notch with the square before moving on.
One critical checkpoint after cutting: place the stringer on a flat surface and check that all tread lines are level (use a spirit level or straightedge). If any tread line tilts more than 1°, the notch depth is wrong and the finished stair will feel sloped underfoot. Fix it before installing – shimming treads on a bad stringer doesn’t solve the underlying geometry error.

figcaption>Framing square with stair gauges marks notch layout
Real-World Context: What Actually Happens on Site
The gap between textbook layout and site reality costs time and lumber. Here’s what experienced builders encounter – and how to handle it.
Problem: The floor isn’t level. If the top or bottom landing slopes by more than 5mm across the stringer’s contact width, the first or last riser will be off. Fix this before layout: shim the stringer contact point or grind the concrete flat. Don’t adjust the notch depth to compensate – that creates an inconsistent riser that code inspectors flag immediately.
Problem: The board has a crown or bow. Every 2×12 has some curvature. Place the crown facing upward (toward the treads) – the load will flatten it over time. If you install it crown-down, the stair bounces underfoot. Check by sighting down the board’s edge before marking. Reject boards with more than 5mm crown over 2 meters.
Problem: Knots fall inside the notch zone. A knot at the corner of a notch reduces local strength by 20-40%. If you find one, shift the entire layout by one tread position if the total run allows. If not, sister a steel angle bracket (150x150x3mm) behind the weak notch. Don’t ignore it – that notch carries the highest shear load on the stringer.
Problem: You cut too deep at the corner. If the overcut exceeds 3mm, don’t install that stringer as-is. Cut a plywood gusset (18mm exterior ply, 100x150mm) and glue-screw it behind the notch. This restores about 80% of the lost strength. For structural stairs carrying more than 200kg live load, replace the stringer entirely.
Weather during installation also affects the result. In temperatures below 5°C, pressure-treated lumber is stiff and brittle – the notch corners can chip during cutting. Use a sharp blade and cut slowly. In temperatures above 35°C, the wood fibers are softer and may tear rather than cut cleanly. A 60-tooth carbide blade prevents this regardless of temperature.
Limitations, Edge Cases, and When to Call a Professional
Stringer layout has hard limits. Recognizing them prevents structural failures that show up months later.
Span limit: A single 2×12 stringer without center support should not span more than mm horizontally. Beyond that, add a center stringer or reduce tread spacing. The deflection limit is span/360 under live load – at mm unsupported span, a 2×12 deflects 4-5mm under a 90kg person, which feels bouncy and eventually loosens tread fasteners.
Curved or spiral stairs: Standard layout techniques assume straight runs. For curves, you need CNC-cut stringers or segmented straight stringers with angled connections. The notch geometry changes at every step because the radius shifts. This is professional territory – DIY layout errors on curved stairs are expensive to fix because every board is unique.
Exterior stairs in freeze-thaw climates: Water enters notch gaps, freezes, and expands. Over 3-5 winters, the notch corners split. The fix: seal all notch surfaces with exterior wood epoxy before installing treads, and use stainless steel fasteners (not galvanized) at every tread-to-stringer connection. Galvanized nails corrode within 2 years in wet exterior conditions.
Load beyond residential: If the stair serves as an egress path for commercial use or must carry equipment over 250kg, the stringer design requires engineering calculation. Standard 2×12 layout assumes 1.9kPa live load (residential). Commercial egress requires 4.8kPa – nearly triple. The notch depth and stringer thickness must increase accordingly.
When to call a professional: if the total rise exceeds 3 meters (requires mid-landing and structural connection to the building frame), if the stair is freestanding with no wall support on either side, or if local building code requires engineered drawings (most jurisdictions do for exterior stairs above 600mm height). The cost of a structural consultation ($200-500) is less than replacing a failed staircase.
Decision Guidance: Choose Your Approach
Choose DIY layout with 2×12 solid sawn if your total rise is under 3 meters, the stair is straight-run, you have a framing square and circular saw, and the stairs are indoors or covered outdoors. Budget: $40-80 per stringer in materials.
Choose LVL or steel stringers if the span exceeds mm, the stairs are fully exposed to rain, or you need minimal deflection for a floating design. Budget: $120-300 per stringer. Add professional installation if you lack welding or LVL-cutting tools.
Choose professional design and fabrication if the stair is curved, freestanding, over 3 meters total rise, or must meet commercial load codes. Budget: $400-900 per stringer installed. The structural liability justifies the cost.
Next step: once your stringers are cut and verified, the assembly phase begins – attaching treads, risers, and railings. For the full assembly sequence including stair railing attachment points and tread fastening methods, see our stair railing installation guide. If you’re still deciding between materials, our stair stringer material comparison breaks down cost-per-stair for Douglas fir, LVL, and steel. And for the broader context of planning your staircase from start to finish, the stairs and railings complete guide covers layout through finishing.
One last check before you cut: measure your total rise twice, verify your square’s stair gauges with a tape measure, and cut a test notch in scrap lumber first. The 10 minutes you spend verifying saves the 45 minutes you’d spend recutting a $20 board. That’s the difference between a staircase that feels solid for decades and one that starts creaking before the paint dries.