Picking out a new kitchen can eat an entire weekend. Holes show up six weeks later — doors that won’t close, a rangehood that doesn’t catch the steam, a benchtop lip-out you see every morning with your coffee.
The bit that decides whether those problems show up isn’t the cabinetry, the benchtop, or the tap. It’s the order you do the work in: rough-in plumbing and electrical before plaster, cabinet set before benchtop template, rangehood commissioned last. Most failed renovations look like material problems; almost all of them are sequencing problems.
This guide walks the full project — scope, plan, trades, surfaces, layout, cost, what to leave to a licensed professional, and what to check at handover. Use it as the working document from the day you decide to renovate, not after the first quote lands.
What a Kitchen Renovation Actually Involves
A kitchen renovation is not one job. It is a chain of trades that each depends on the previous one finishing clean. The chain starts with a design brief — a one-page document that says what the room needs to do, not what colour the cabinets are — and ends with a commissioned rangehood and a signed-off defect list.
Between those two points sit the decisions that decide whether the room lasts ten years or thirty. The cabinetry layout determines where plumbing and electrical can run. The splashback zone dictates whether the wall behind the cooker gets a waterproofing membrane or just paint. The substrate prep — whether the floor is flat enough for stone or only flat enough for tile — decides which benchtop materials are even on the table.
Then come the services. Rough-in plumbing sets the exact position of the sink, dishwasher, and any gas point. Rough-in electrical decides how many dedicated circuits the oven, induction cooktop, and rangehood each need. Get those two on paper before anyone opens a wall, and the rest of the trades can run in parallel.
Skip them and the tiler waits while the electrician finishes, and the cabinetmaker waits for the tiler.
In practice, the section that decides the whole project’s duration isn’t cabinetry — it’s the rough-in plumbing and electrical. Get those on paper first and the rest of the trades can run in parallel; skip them and the tiler waits while the electrician finishes.
Plan Before You Measure (the Decisions That Decide Everything)
Most homeowners start with finishes. Experienced kitchen designers start with the workflow triangle — the path between sink, cooker, and fridge. That triangle is the engine of the room. If one leg is too long or two legs cross a walkway, the kitchen feels wrong no matter how expensive the stone is.
Clearances matter just as much. A 90 cm walkway is the minimum for one person to work comfortably; 120 cm clearances at the cooking zone give someone room to stand at the cooktop while another walks behind. Shave those numbers to squeeze in an island or a breakfast bar and the room stops being a kitchen and starts being an obstacle course.
Once the triangle is locked, the next document is the appliance schedule — dimensions, power, and water requirements for every appliance. That feeds the cabinet plan, and the cabinet plan feeds the structural wall check and service rough-in point.
Experienced kitchen designers spend the first hour on workflow and clearances, not finishes. The benchtop can be the cheapest item on the quote and still be the wrong choice if the workflow triangle pushes two doors into one 80 cm corridor.
Set the Order of Trades (Why Sequencing Beats Speed)
A kitchen renovation runs on a fixed sequence. Break the sequence and trades start working around each other instead of after each other. The order below is the one that keeps the project moving.
- Demolition — strip the old kitchen to bare walls, floor, and ceiling. Check for asbestos in pre-1990 Australian homes before anything comes down.
- Structural rectification — open walls, reinforce lintels, patch any damage the demolition revealed.
- Plumber rough-in — run new water and gas lines to the positions the design brief set.
- Electrician rough-in — run dedicated circuits for oven, cooktop, rangehood, and any under-cabinet lighting.
- Plaster / substrate prep — set walls flat, level the floor, apply any required waterproofing membrane in wet areas.
- Cabinet set — install and level all carcasses and doors.
- Benchtop template — measure the benchtop against the actual installed cabinets, not the drawing.
- Splashback tile / panel install — set the wall surface behind the cooker and sink.
- Rangehood connection — duct and commission the extraction unit.
- Fit-off — install handles, kickboards, shelves, and any final trim.
The sequence most projects get wrong is benchtop template — measure it after cabinet set, not before.
In the field, the trade most often scheduled in the wrong order is the benchtop fabricator — measure template only after the cabinets are set and levelled, never before.
Two sequencing mistakes show up again and again: commissioning the rangehood before the duct is fully connected (so it recirculates instead of extracting) and tiling the splashback before the benchtop is templated (so the grout line sits in the wrong place). Both are covered in more depth in the common kitchen reno mistakes article, and kitchen ventilation options explains the ducting requirements rangehood installers work to.
Cabinets, Benchtops, Splashback: the Three Surfaces That Carry the Room
Three surfaces do most of the visual and functional work in a kitchen.
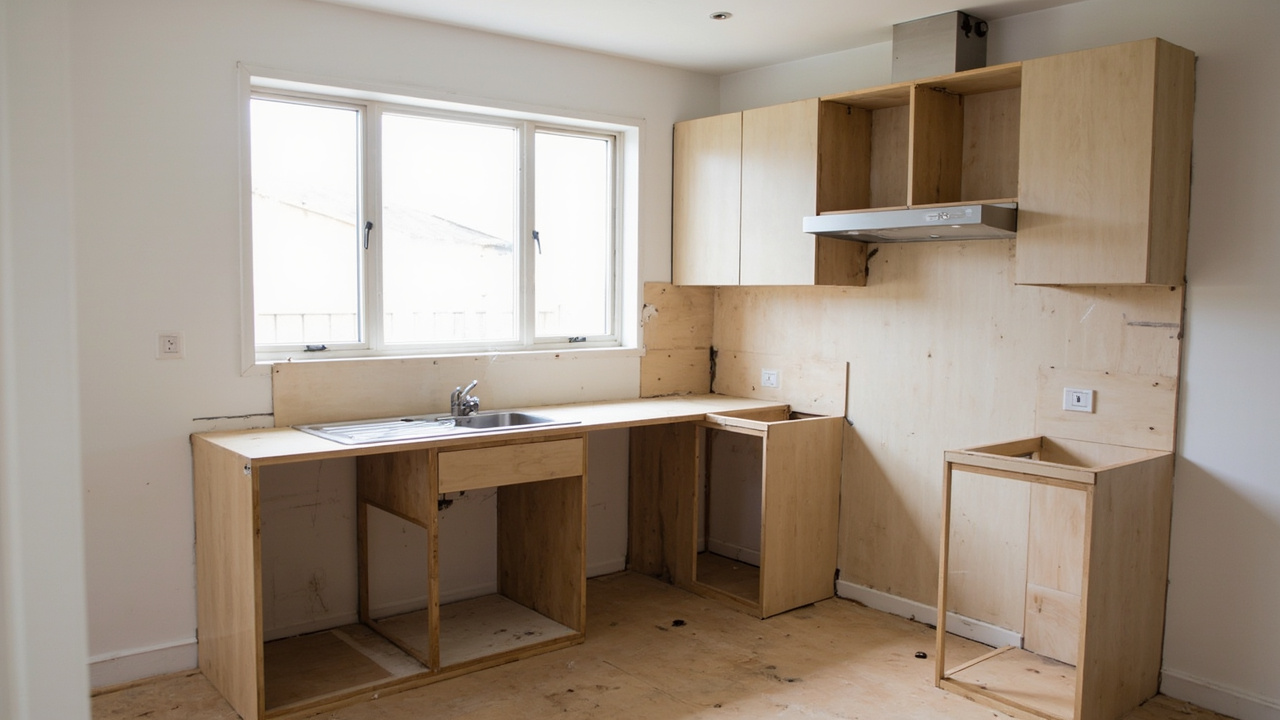
Cabinets are carcass plus finish. MDF is flat, stable, cheap — but swells if water enters a joint. Plywood handles moisture better and holds screws tighter, costs more. The top finish — often HPL (high pressure laminate) — decides heat, scratch, and cleaning tolerance.
In a humid subtropical climate like Sydney or Brisbane, plywood carcass with HPL finish is the combination that holds up longest.
Benchtops are pre-fabricated or site-measured. Laminate and some timber can be cut on day one. Stone, porcelain, and concrete need a stone fabricator to template after cabinets are set — the single most important measurement in the project.
A waterfall edge (benchtop wrapping to the floor) adds cost. A porcelain slab gives stone-like profile with better heat resistance than laminate, but needs an experienced fabricator — it cracks if substrate isn’t flat.
Splashbacks are either tile or panel: tile offers pattern but needs grout sealing; glass has no grout line but shows every fingerprint.
Pick the wrong order here and the benchtop fitter becomes the last trade on site instead of the second one in — delaying splashback, plumber, and electrician fit-off.
For a deeper comparison of carcass and finish options, see cabinet materials compared, and for the full benchtop landscape, benchtop materials compared walks through stone, laminate, porcelain, timber, and concrete with cost and maintenance trade-offs.
Layout Geometry: L, U, Galley, Island — When Each One Works
The layout is the skeleton everything else hangs on. Four main geometries cover most kitchens, and each one has a minimum room size below which it stops working.
An L-shape fits against two adjacent walls. It works in almost any room size and leaves the rest of the floor open.
A U-shape wraps three walls and gives the most bench and storage per square metre. It needs a room at least 2.4 m wide, or the two legs fight each other.
A galley (corridor kitchen) runs two runs of cabinets opposite each other — efficient per metre, but unforgiving: the corridor needs 120 cm minimum for two people to pass.
An island bench adds a fourth work surface in the middle of the room — only workable with 90 cm clearance on every side, which means a room roughly 3.6 m wide. A peninsula is the smaller sibling: one end attached to a wall, with less clearance required on the closed side.
An island in a 2.4 m galley isn’t an upgrade — it’s a collision; the 90 cm clearance rule is non-negotiable.
For a side-by-side look at each geometry with room-size thresholds, see kitchen layouts compared, and if the room is under 10 m², small kitchen renovation ideas covers the tricks that make a tight layout feel bigger.
Cost Reality: What Goes Into a Real Renovation Quote
A kitchen quote is not one number. It is a stack of cost lines, and the ones that surprise homeowners are rarely the ones they asked about first.
Cabinetry is roughly a third of the project. It’s quoted per linear metre based on carcass, finish, and door profile. Benchtop cost per square metre varies most — laminate at one end, stone with a waterfall edge at the other. Splashback cost is also per square metre, with tile usually cheaper than glass or porcelain slab.
The appliance package is often the second-largest line after cabinetry. Labour days cover carpenter, plumber, electrician, tiler — usually 10–15 working days for a full renovation.
The cost lines that bite are the ones that don’t show up in the first spreadsheet: plumbing relocation (moving the sink more than a metre from its existing position), electrical upgrade to dedicated circuits for induction or a large oven, and the 10–15% contingency most homeowners skip because the quote looked clean. Add waste removal and any permit and certification fees, and the final number is almost always higher than the first quote.
For a line-by-line breakdown with typical ranges and where the hidden costs hide, see the kitchen renovation cost breakdown.
When to DIY, When to Call a Licensed Professional
The line between DIY and licensed work is not about skill — it’s about liability and warranty. A homeowner can paint, assemble flat-pack cabinets, tile a splashback, and lay vinyl flooring. None of those requires a licence, and none of them voids an insurance policy if something goes wrong later.
What always needs a licensed tradesperson is gas fitting, mains electrical, and any wet-area waterproofing that carries a warranty. A licensed plumber signs off on any work that connects to the water or gas main. A licensed electrician signs off on any new circuit, any work in the switchboard, and any connection that needs a certificate of compliance. A licensed builder is required in most Australian states if the renovation involves structural work — removing a wall, adding a beam, or changing the building’s footprint.
Waterproofing is its own category. A waterproofing applicator who is licensed and insured can issue a warranty that an insurance company will recognise. A homeowner who does their own waterproofing in a wet area may find the warranty is void when a leak shows up three years later.
One more thing to flag: Australia’s 2024 ban on engineered stone affects benchtop choice. It doesn’t ban stone benchtops — it bans a specific material (crystalline silica above a threshold) for fabrication and installation. Porcelain, granite, and natural stone are still available. The ban is a chronology note, not a policy claim, but it does mean the benchtop fabricator you talk to will steer you toward compliant materials.
A homeowner can paint, assemble flat-pack cabinets, tile a splashback, and lay vinyl flooring — none requires a licence. What always needs a licensed tradesperson is gas fitting, mains electrical, and warrantied wet-area waterproofing.
Handover and the First 30 Days
Handover is not the end of the project. It’s the start of the defect period — usually 12 months — during which the builder or tradesperson fixes anything that wasn’t right on the day they finished.
The first thing to produce at handover is a defect list: a written record of every item that needs attention, with photos. Walk the room with the builder and point out anything that doesn’t sit right — a door that doesn’t close flush, a drawer runner that catches, a sealer that hasn’t cured. The list protects both sides.
Cabinet adjustment is the most common handover task. Hinges settle, drawer runners loosen, and a 2 mm tweak on the first visit saves a second call-out. Sealer curing takes longer than most people expect — stone benchtops need 24–48 hours before heavy use. Benchtop sealing on natural stone or concrete is a maintenance item, not a one-time event; plan to reseal every 12–24 months depending on use.
Rangehood commissioning is the step most builders skip. The rangehood should be tested with the duct fully connected, on every speed, to confirm it extracts rather than recirculates. Smoke alarm interconnection should be retested after any electrical work — the electrician should do it, but the homeowner should confirm.
The final step is the final invoice + lien release. Pay the last retention (usually 5–10%) only after the defect list is complete, and get a written release confirming all subcontractors have been paid. That release protects the homeowner from a subcontractor’s lien if the builder doesn’t pass the money through.
The first defect to look for at handover is benchtop lip-out at the splashback — that 1–2 mm shadow line means the wall wasn’t flat and the templater didn’t scribe.
Where to Start Tomorrow
The renovation starts with three documents on paper before any quote. A one-page design brief that says what the room needs to do. An appliance schedule with exact dimensions and power requirements. A measured floor plan drawn to scale, with the positions of every door, window, and existing service point marked.
Skip any of those and the first tradesperson on site will ask questions the homeowner can’t answer — and the answers they guess at become the decisions that shape the rest of the project. Get the three documents right and the quotes that come back are comparable, the trades run in the right order, and the room works the way it was supposed to.